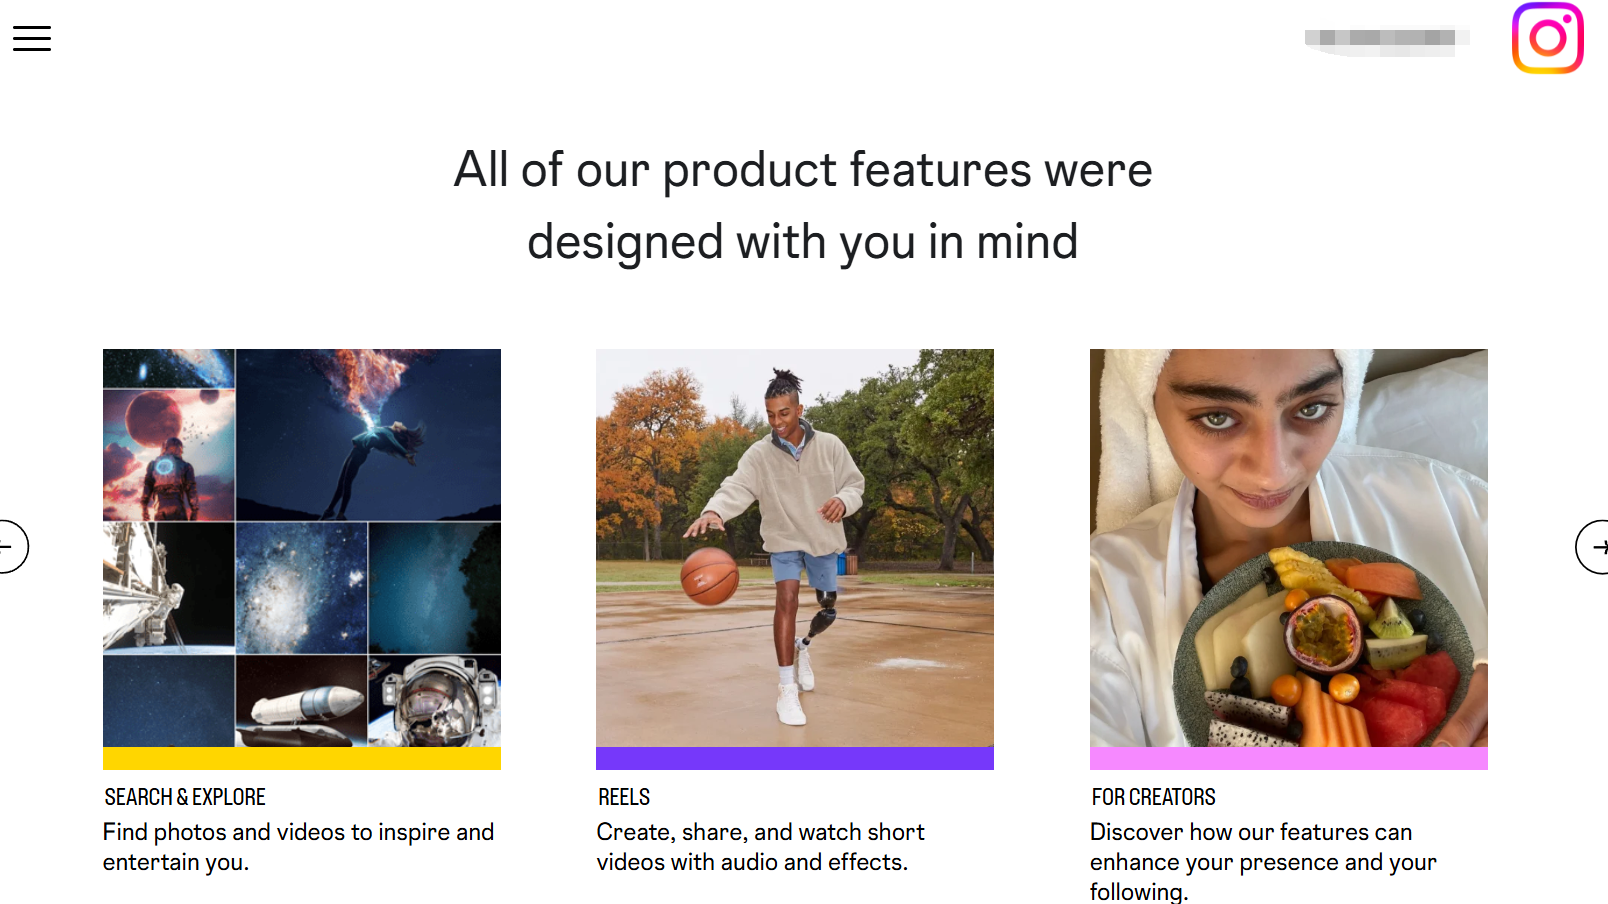
Instagram: a visual social platform (photos, Shorts/Reels, Stories) where discovery is driven by following, search, and recommendations.
Instagram Shop: Instagram’s native shopping flow. After you enable a Shop, you can tag products in posts/Reels/Stories so people tap the shopping bag icon to view product cards and check out (in-app in some regions, or on your own website)
6 fast pre-checks (finish in ~3 minutes)
- Compliance: Your business must meet Meta Terms of Service, Commercial Terms, and Instagram’s Community Standards.
- Own domain: Products in your catalog must be purchasable on a domain you own (third-party marketplace sellers may need domain verification in Business Manager).
- Supported market: Ensure your country/region supports IG Shopping (see Instagram Help Center for availability).
- Professional/Business account: In the app: Profile → menu → Account type & tools → switch to Professional (Business). Quick guide in the Help Center.
- Connect assets in Business Manager: Link your Facebook Page, Instagram account, catalog, and pixel/Conversions API in Business Manager.
- Update the app: Many “missing button” issues are solved by updating Instagram (as the video notes).
The 15-minute setup (do it once, reap daily)
Step 1 — Create the shop
Open Meta Commerce Manager → create a shop → choose checkout type (in-app where supported, or redirect to website).
Step 2 — Connect Instagram & Facebook Page
Attach your IG account and FB Page to the same Business Manager so assets are centrally controlled.
Step 3 — Build/import your product catalog
- Shopify: use the official Instagram/Facebook channel to auto-sync the catalog (guide: Shopify × Instagram Shopping).
- Non-Shopify: add products in Commerce Manager (images, title, price, stock, URL) via manual add or data feed.
Step 4 — Submit for review & enable product tagging
Once approved, you can tag products in Posts/Reels/Stories. Content becomes a “living shelf.”
Step 5 — Verify tracking & checkout path
If you drive to your site, set up pixel/Conversions API in Ads Manager for optimization and attribution.
Tip (from the tutorial): Shopify admins can view revenue/traffic driven by the IG channel under Apps & Sales Channels → Facebook & Instagram → Analytics and slice by channel/time window.
Content that converts: make every post a “mini-storefront”
- Focus one SKU per post when possible: clear cover image + keyworded headline + product tag.
- Tell a story (pain point → solution → result): e.g., “commute outfits,” “gym must-haves,” “carry-on travel picks.”
- The “3E” framework
- Engage: pin useful comments, run polls/QA in Stories, invite UGC.
- Educate: how-to usage, care guides, material/fit notes (write as bullets; avoid tables).
- Excite: limited-time coupons, giveaways, loyalty perks to trigger action now.
- Go multi-placement: Combine Feeds + Stories + Reels; reference Meta’s case studies in the Business Success Hub.
Ads & analytics: close the loop from view to purchase
- IG Insights: coverage, engagement, follower active hours—post when your audience is online.
- Commerce insights: monitor product views → taps → adds to bag; fix naming/thumbnails if drop-offs spike.
- Ads Manager: start with catalog/Advantage+ shopping objectives; use value optimization and retargeting (viewed, added to cart, no purchase).
- A/B: iterate thumbnails, first-line copy, and price anchors; scale winners only after stability.
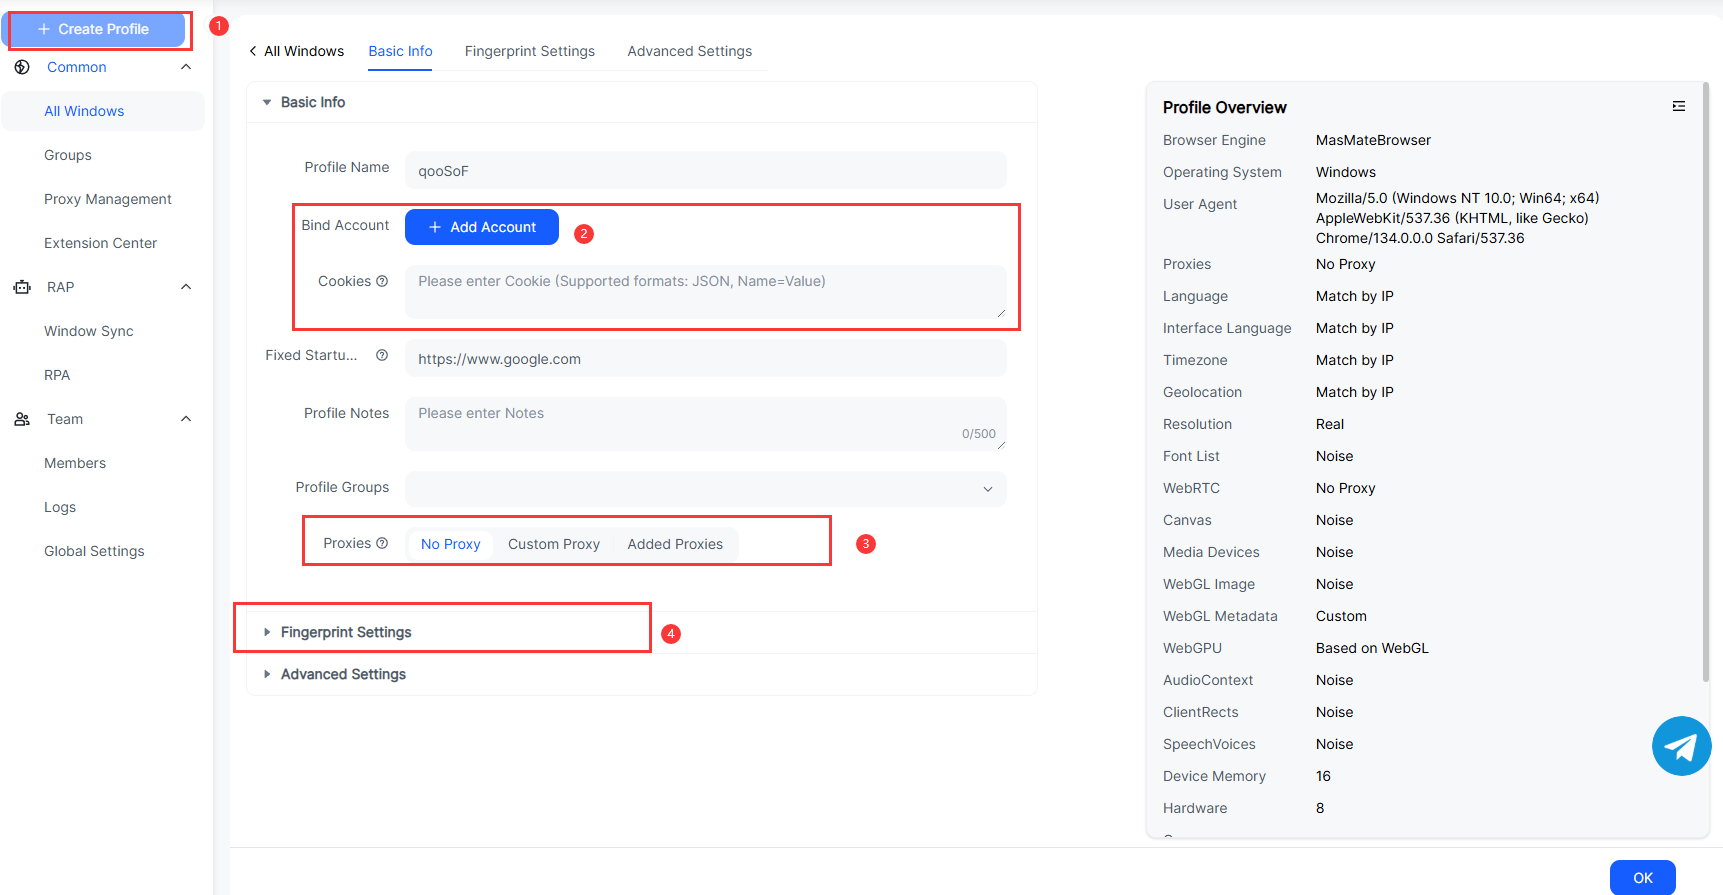
Manage multiple IG Shops safely with MasLogin
Perfect for brand matrices, agencies, and cross-border teams.
- Isolated environments: Create a unique fingerprinted browser for each IG account; cookies, storage, and device traits are sandboxed to cut association risk.
- Stable proxies per shop: Pin consistent IP/region to stabilize device reputation.
- Role-based collaboration: Split “Ops / Ads / Support” permissions to prevent accidental changes.
- Window Sync: Mirror the controller window to multiple windows—bulk-edit prices, stock, descriptions in one pass.
Quick start
- In MasLogin, create environments named “IG-Shop-Country.”
- Bind fixed proxy/IP for each environment.
- First login: complete IG device fingerprinting and save.
- Use Window Sync to finish profiles, catalog checks, and product tagging in bulk.
- Assign user roles and SOPs.
Official site: MasLogin
Use MasLogin RPA to automate product ops at scale
- Timed/batch publishing: Parameterize images, titles, prices, and URLs; schedule auto-publishing product posts with product tags.
- Marketing calendar: Auto-post new-arrival teasers, restock alerts, flash deals across multiple shops.
- Catalog health checks: Auto-detect missing images/prices/out-of-stock and alert.
- Multi-account rotations: Rotate operating accounts by timetable to avoid risky frequent logouts/logins.
- Reporting: Pull post performance & product taps; export CSV for ad optimization.
RPA rollout pattern
Record a “publish product + tag” flow → parameterize (CSV) → set schedule (e.g., 10:00 & 20:00 daily) → choose account list → monitor logs & retries.
FAQ (what buyers & IG Shop newcomers ask most)
Q1: Can I run IG Shop without a website?
Some regions allow in-app checkout, but a brand site is still recommended for SEO, email capture, and lifetime value.
Q2: How often should the catalog sync?
Daily or near-real-time. At minimum keep price/stock aligned to avoid failed orders and negative reviews.
Q3: A product was rejected—what now?
Check for restricted categories, creative violations, or geo limits; fix and resubmit or appeal in Commerce Manager.
Q4: I opened the shop but traffic is low.
Improve covers & titles, post consistently, and pair organic with catalog ads + creator/UGC collabs.
Q5: How many products can I tag per post?
You can tag several, but conversions usually improve when each piece of content focuses on 1–2 hero SKUs.
Q6: Should I use in-app checkout or website checkout?
In-app reduces friction (where available). Website checkout gives you full control of the brand experience and data. Many cross-border brands run both where possible.
Q7: How do I avoid multi-account linkage/flags?
Don’t share devices/IPs/fingerprints across shops. Use MasLogin to isolate each account’s browser fingerprint & cookies (tutorial below).